iPhone photo guide
Why iPhone Photos Have No Location (and How to Fix It)
A photo can look perfectly normal while carrying no GPS coordinates. Here is how to find the cause, repair locations you know, and avoid creating confident-looking guesses.
The short answer
If an iPhone photo has no location, first open it in Photos and swipe up or tap the Info button. A map means the file has a location; no map means Photos does not currently have coordinates for it. You can add a known place with More > Adjust Location, or select several photos and adjust them together.
For future pictures, check Settings > Privacy & Security > Location Services > Camera and allow location while using the app. Keep Precise Location on if you want an accurate photo map.
The important distinction is that a missing location is usually a metadata problem, not a missing-photo problem. The image is still there. It simply does not carry the GPS coordinates that Apple Photos, a photo-map tool, or Mapsake would need to place it on a map.
How to tell whether a photo is missing its location
Check the individual photo before changing a permission or editing a whole album:
- Open the photo in the Photos app on your iPhone.
- Swipe up on the image, or tap the Info button.
- Look for a map and place name beneath the camera details.
- If a map appears, tap it to inspect the exact point. If there is no map, the item has no location available in Photos.
Apple's photo information guide shows the current Info view and the controls for adjusting a date or location.
A photo can also have a location that is present but wrong. That often happens after a camera clock was incorrect, a scanned image inherited unrelated metadata, or someone manually picked the wrong place. Do not treat every surprising pin as proof that GPS failed. Compare it with neighboring photos from the same day before correcting it.
Why do some iPhone photos have no location?
There is no single cause. The most common explanations are:
- Camera did not have location permission. Location Services may have been off globally, denied for Camera, or restricted at the time.
- The image did not come from the Camera app. Screenshots, scans, saved web images, social-media downloads, and many images received from other people were never tied to your current location.
- Location was removed during sharing or export. Apple lets a sender omit location before sharing. Other apps and conversion tools may also strip metadata.
- You downloaded a derivative instead of the original. A resized preview or converted copy from a photo server may contain pixels but omit the original GPS fields.
- The camera could not establish a useful position. Poor reception, disabled Precise Location, or taking a picture immediately after opening Camera can leave less accurate or missing coordinates.
- The date is wrong. The GPS may exist, but a bad date can make the photo disappear from the trip or year where you expected it.
This is why file type alone cannot answer the question. HEIC and JPEG can both contain GPS metadata, but neither format guarantees that a particular file has it.
Turn on photo locations for pictures you take next
To let the iPhone Camera add a location to future photos:
- Open Settings.
- Go to Privacy & Security > Location Services.
- Make sure Location Services is on.
- Choose Camera.
- Select While Using the App.
- Turn on Precise Location for more accurate pins.
Apple explains the available permission choices in its Location Services guide. The labels can vary slightly by iOS version, but Camera must be allowed to use location while you are taking a picture if you want coordinates written automatically.
This setting is prospective. Turning it on today does not reconstruct locations for old photos. Older gaps need a known manual location or a careful repair based on other evidence.
How to add a location to one iPhone photo
When you know where a photo was taken, Photos provides the simplest correction:
- Open the photo and tap More.
- Choose Adjust Location.
- Search for the city, landmark, or address.
- Select the correct result and check the pin.
You can also reach these controls from the Info panel. If the current pin is wrong, use the same Adjust Location action to replace it. Apple's location-metadata safety guide covers adding, changing, and removing a location.
Choose the most specific place you can support without guessing. A city-level location is more honest than a precise restaurant pin you are not sure about. Once saved, the edited location can help the image appear in Photos searches, map views, and compatible travel-map apps.
How to add a location to multiple photos at once
If a group came from the same event or destination, you do not have to edit each image separately:
- In Photos, tap Select and choose the images.
- Open the More menu.
- Tap Adjust Location.
- Search for and apply the known place.
Batch editing is useful for a scanned album, an exported camera folder, or a group shared without coordinates. Be conservative with trips that covered a large area. Assigning one hotel pin to a week of photographs may make a tidy map, but it creates false precision.
For a mixed batch, start with obvious groups: pictures taken within a single attraction, meal, or afternoon. Leave uncertain images unlocated until you have better evidence.
Why photos received from someone else may have no GPS
Location belongs to the file's metadata, not to the scene visible in the picture. A friend can send you a recognizable photograph of Rome with no embedded coordinates at all.
On iPhone, a person sharing from Photos can open Options in the share sheet and turn off Location. Messaging and social apps may remove or rewrite metadata as part of compression. Screenshots of photos also create new files without the original camera metadata.
That behavior is often desirable. Exact coordinates can reveal a home, school, workplace, or routine. A missing location on a received file may be an intentional privacy decision, so ask the sender or add only a general place you genuinely know.
Why downloaded or Immich photos can lose their location
Self-hosted photo libraries commonly distinguish between an original file and a preview, thumbnail, or converted download. The server may know where an image was taken while the downloaded derivative does not include the original EXIF GPS fields.
If a downloaded HEIC or JPEG will not appear on a map:
- Inspect its Info panel after adding it to Photos, or use a local metadata viewer.
- In the photo server, choose an option labeled original, unmodified original, or download original when available.
- Compare that file with the first download.
- Confirm that the server's own location came from embedded metadata rather than a database-only edit.
This was the cause to investigate when a file looks valid but a map tool reports no usable locations. The extension tells you how the picture is encoded; it does not prove GPS coordinates survived the download.
Check JPEG and HEIC locations with a private browser tool
Mapsake's free photo map maker is a quick way to audit a group of JPEG or HEIC images on a Mac, iPhone, or iPad. Choose the files and it plots the usable coordinates directly in your browser. The files are not uploaded to Mapsake.
The result gives you two useful facts: which images contain readable GPS coordinates, and where those coordinates point. If the tool says it found no usable locations, try a known original iPhone photo as a control. If that works, the issue is with the metadata in the other downloads rather than the browser or map.
The tool intentionally skips files without GPS. It does not infer a place from filenames, visible landmarks, or your IP address. That makes it useful as an honest metadata check before you edit a library.
Find missing locations in Mapsake
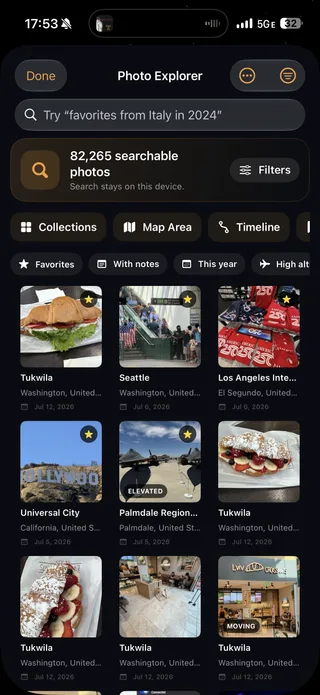
Mapsake includes Find Missing Locations in Photo Explorer for gaps inside an Apple Photos library. It looks for a strong time-based clue from nearby, already-located photos and presents a possible location for review.
The confirmation step matters. Imagine three iPhone photos taken within a few minutes: the first and third have the same location, while the middle image has none. That is useful evidence, but it is still a suggestion rather than proof. Mapsake shows the proposed repair so you can accept or reject it instead of silently changing the library.
After importing your photo history, open Photo Explorer and choose Find Missing Locations. Review each candidate in context. Skip anything uncertain, especially photos that may have been saved, scanned, or received rather than captured at that moment.
Why a photo can be missing from the Apple Photos map
Apple Photos maps only items that have embedded location information available to the library. To browse them, open your library, use the sort and filter controls, and choose Show Map. Apple's map guide notes that only photos and videos with embedded GPS information appear.
If one expected image is missing:
- Open it and check Info for a map.
- Clear filters and confirm that you are viewing the right library.
- Check whether it is a screenshot, scan, or received file.
- Verify its date and time, including the time zone.
- Add or correct the location only when you know it.
If many recent Camera photos are missing, inspect Camera's Location Services permission. If only imports are missing, investigate the export or download workflow instead.
Why a located photo can be missing from a trip
A trip view depends on both where and when. A picture with correct coordinates but a date several years off may appear on the map while being absent from the vacation you are browsing.
Open Info and compare the timestamp with neighboring images. For an incorrect value, choose Adjust Date & Time and enter the known time. Be careful around flights and time-zone changes: a few hours of difference can move an image to the previous or next day without the camera clock being fundamentally broken.
After repairs, allow Photos and any travel app time to refresh their collections or index. Then retry the destination, year, or trip search. The companion guide, How to Search iPhone Photos by Place, Year, Camera, and More, has a fuller workflow for finding the result after its metadata is correct.
Remove a photo location when privacy matters
Sometimes the right fix is to remove a location, not add one. In Photos, open the image, choose Adjust Location, then select No Location. You can also turn off Location in the share-sheet Options before sending a copy.
Consider removing or generalizing coordinates for pictures taken at a private home, a child's school, a medical appointment, or any place you do not want attached to a shared file. Keep in mind that removing location from a shared copy is different from removing it from your library.
Mapsake is designed around a local-first privacy model: supported photo matching and exploration happen on your device, and the core app does not require a Mapsake account. Public sharing is a separate action you control. Still, every export deserves the same basic question: does the recipient need the location to understand this photo?
A troubleshooting checklist for iPhone photos with no location
Work through this list before making broad edits:
- Check Info. Confirm whether the individual photo actually lacks a map.
- Check the source. Was it captured with Camera, received, scanned, screenshotted, or downloaded?
- Test an original. Compare a known original iPhone photo with the affected file.
- Check permissions. For new Camera photos, allow location while using Camera and enable Precise Location.
- Check the date. Make sure the image is not simply filed under the wrong day or year.
- Download the original. Avoid a thumbnail or converted derivative when working from a photo server.
- Audit locally. Use the private JPEG and HEIC map tool to see which files contain GPS.
- Repair carefully. Add a known place in Photos or review Mapsake's missing-location suggestions.
- Protect private places. Remove location before sharing when the coordinates are unnecessary.
Do not let the desire for a complete map turn uncertainty into false data. A blank spot you can revisit is better than a confident pin in the wrong city.
Frequently asked questions
Do all iPhone photos have location data?
No. Camera photos can include location when permission and positioning are available, but screenshots, scans, downloads, shared images, and files exported without metadata may not. Location can also be removed intentionally.
Can I recover the exact location of a photo with no GPS?
Not from the file alone. The date, nearby photos, an album, a message, or a recognizable landmark may provide evidence. Treat any result as a hypothesis until you can verify it.
Does HEIC keep iPhone location data?
HEIC can store GPS metadata, and original iPhone HEIC files often do. A converted, edited, or downloaded HEIC can still lack it. Check the specific file rather than relying on its extension.
Will turning on Camera location fix old photos?
No. It affects future captures. Add locations to older photos manually when known, or use a review-based repair workflow for strong gaps.
Can Mapsake make a map without uploading my photos?
Yes. The browser photo map maker reads supported files locally, and Mapsake's supported photo indexing runs on the Apple device. A photo still needs usable coordinates before it can appear on a map.
Build a travel map you can trust
A useful photo map is not the one with the most pins. It is the one whose pins mean something. Start by checking the actual metadata, correct places you know, leave uncertain images alone, and prevent future gaps with the right Camera permission.
When the library is ready, build a travel map from your photos in Mapsake. You can review discovered countries, regions, cities, and trips while keeping supported photo analysis on your device, then return to Photo Explorer whenever a missing location needs a closer look.